Have a Wonderful Time with this Unit as I did with my son.

You can evolve this unit in so many different ways ~ below you will find brief examples of some creative craft ideas.
The Lessons will encourage: the use of language, mathematics, science, nutrition, and art.Inquire Some Resources
Hint ---> Public Library!!!! OR... check out your local book store.
Save Money ----> Use Recycled Material.
Note: The way I like to introduce various lessons is by using the"First/Then" tactic.
"First, we are going to read _____, then, we are going to do __________" Believe it or not this truly does work. (IF and WHEN used consistently)
Lesson 1: The Egg is on the Leaf
First: Read!! 'Are you a Butterfly?' by: Judy Allen
![Are You a Butterfly? [Book]](https://lh3.googleusercontent.com/blogger_img_proxy/AEn0k_sL0OP3f-SNPyKBVRtQmOHSJOd6jpHhHUVc4Oe9dZ19wY2XSdRrfrmnweEtomWOHbA_dPIk35jHgmp3eWaIT9GZPvLUhdtVlwbzFlJCzI-0NcQU04vmUitek2-9FGqtSPzY50NzvIV21a_xGltfU7wJuwPR383o=s0-d "Are You a Butterfly? [Book]")
~Appropriate for young readers
~Wonderful Illustrations
~Easy to Follow
~Allows the young readers to follow along with the metamorphosis from a caterpillar to a butterfly therefore, sets the child up for the next activity.
Afterwards~ Be sure to ask questions.
Activity 1: The Egg is on the Leaf
Materials: White Paper, Green Paint, and a Marker.
Directions:
- You are going to draw a Leaf (Does not have to be perfect- a large oval with lines in it would work)
- On that Leaf Draw a Small Circle.
- Paint the Leaf green.
- Once dried. Paint the circle white.
- Once finished write out the title 'The egg is on the leaf' along with the words 'Egg' and 'Leaf' pointing to each item.
- Compare the picture with the book.
- Discuss the activity regarding similarities and/or differences.
Activity 2: Playdoh Leaf
Materials: Green and White playdoh
Directions:
- Take a small amount of green playdoh. Roll it.
- Smash the green playdoh onto a plastic plate. Shape it into a leaf.
- Take a tiny amount of white playdoh. Roll it. Place onto the green leaf.
*Great for tactile and visual stimulation.
No Playdoh on Hand??
Use the following Recipes:
"All by Myself Dough" ~Not-to-mention you don't have to cook anything.
- 1 cup all-purpose flour
- 3/8 cup of salt
- 3/8 cup of warm water (add more if needed)
- food coloring if you like. (be sure to wear gloves as this will stain)
- Combine flour & salt into a medium-size bowl
- Pour in the water and stir well
- Knead on a floured surface.
- Add in the desired amount of food coloring.
- Once finished place in a Ziploc bag.
- Place unused dough in the refrigerator. It will last up to a week.
First: Gather Prior Knowledge by asking open-ended questions such as: "What did we learn about yesterday?" By doing so, will guide you into filling in the blanks of what the child does or does not understand.
 Second: Read!!!
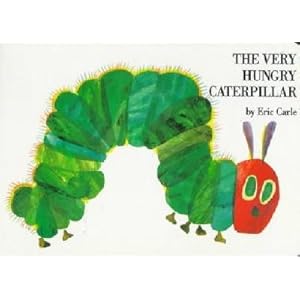
 I highly recommend the book: 'The Very Hungry Caterpillar by: Eric Carle'
* In my mind: This is a Must Have.
~ Visually Stimulating
~ Sparks Interests
~ Creates the Process of Thoughts and Questions within young minds.
~ Bright Colors
~Language that Flows
~A smooth read and easy to understand.
Activity 1: Caterpillar Eating a Leaf.
Materials: White paper, crayons, water-colors, and a marker.
Directions:
- Draw the desired circles for the caterpillar's body.
- Add a face. Include a leaf in its mouth.
- Once finished coloring write out the title "The Hungry Green Caterpillar" along with the words: 'Caterpillar' and 'Leaf'.
- Cut out.
- Compare your picture with the book. Discuss.
- Once finished watch the clip: The Very Hungry Caterpillar Enjoy!!
Activity 2: Pom-Pom Caterpillar
Materials: Different Color Pom Poms (5-7), Tacky Glue, Wiggly Eyes, and two 1 inch pipe cleaners.
*note: Elmers glue does not work well with this activity.
Directions:
- Glue the pom-poms together.
- Glue the wiggly eyes on the first pom-pom.
- Glue the pipe cleaners on top of the first pom-pom.
Activity 3: Fun with Food
Materials: Actual Food Items from the Book 'The Very Hungry Caterpillar' such as: Strawberries, Apples, Bananas, etc.
Directions:
- Discuss the food items regarding what they look, feel, smell, taste and yes, sound like. * This activity will emerge the senses as you will be using them all.
- Make 7 circles out the fruit. Do this with the child.
- Put them together in the shape of a caterpillar.
- Using the seeds from the strawberries make the eyes.
- Using the seeds from the apples make the feet.
- Discuss and Enjoy the snack!
Materials: 8 Strips of 1-inch construction paper (both dark and light green), stapler, wiggly eyes, 1 brown or black pipe cleaner cut in half, and a red marker.
Directions:
- Take one end of a strip of paper and staple the ends together (as though you were making a ring.)
- Take another strip and put it inside the already made ring and staple the new one together. Keep doing this until all of the strips make a chain.
- Draw a smile.
- Bend a small round circle knot on one end of the pipe cleaners.
- Glue the other end to the same circle with the wiggly eyes on the top of the head.
- Cut a green oval.
- Draw a red mouth
- Glue the wiggle eyes
- Glue the pipe cleaners on the top
- Glue the green oval (head) on the first ring of the chain.

Materials: Recycle an Egg Carton, dark or light green, black, and red paint, wiggly eyes, and 2 1-inch black pipe cleaners.

Directions:
- Cut out 6 'Connected' egg holes.
- Paint the egg carton with the desired color.
- Let dry.
- Glue two wiggly eyes on the first egg hole.
- Paint a little nose and mouth on the first carton.
- Stick the pipe cleaners inside the top of the head.
Lesson 3: The Caterpillar Made a Cocoon
After Gathering Prior Knowledge ~ Read!
I Recommend: 'From a Caterpillar to a Butterfly' by: Deborah Heiligman
~ Age appropriate for young minds.
~ Story follows through a child's eyes and thought process.
~ Cheerful
~ Colorful
~ Inviting to read
Activity 1: Making a Cocoon
Materials: Paper, Black marker, and crayons.
Directions:
- Define: Cocoon. Make sure the definition is age appropriate such as: "A silky protective covering" , "It is like a home." or "It keeps the caterpillar safe while it turns into a butterfly.
- Draw a cocoon shape on a branch. (Basically an upside curvy oval)
- Color using the desired method. (Something different from the previous activities.)
- Label and Discuss.
Materials: White string (white dental floss will work), Popsicle stick, and a twig
Directions:
- With your thumb hold the string onto the Popsicle stick.
- Start wrapping the string around and around (leave a little string left at the end)
- Once finished- hang upside down on twig outside or somewhere in the house.
- Discuss the activity~ specifically regarding what it has to do with caterpillars.
~ Incredible Illustrations.
~ The story flows for the reader.
~ Stimulating for young readers and for those who appreciate art.
Activity 1: Sponge Paint Butterfly.
Materials: Sponges of a butterfly, washable paint, water, construction paper, newspaper and a child size smock.

Directions:
- Prepare the activity in advance. Take out the paper, paint, water, newspaper on the table and put the little one in a smock (or old shirt).
- Demonstrate how to sponge paint. Lightly press the sponge in the paint then press the sponge onto the paper. Simple and Fun. Use your words: "Press" "Sponge" "Paint" "Butterflies" This will help the child develop a stronger vocabulary. "We are making a butterfly painting." *Don't forget your expressions and tone- also VERY important.
Materials: Different color tissue paper,black construction paper, glue stick, and scissors.

- Depending on the child's age have the butterflies already cut out or have the child cut it out.
- Cut out the inner areas of the wings.
- Glue the tissue paper on the back area- so you are able to see the tissue through the opening.
Materials: Coffee filters (round ones), Clothes pins,Water-color paint, and Water.

- Add a little bit of water onto the coffee filter.
- Start painting on the same water covered coffee filter.
- Set to dry.
- Paint the clothes pin a desired color
- Once dried scrunch the middle area of the coffee filter into the clothes pin.
- Expand the Coffee filter wings.
Materials: White construction paper, different color paint, and scissors.
Directions:
- Fold the white piece of paper in half.
- Open the paper.
- Place several dots of the paint in various spots towards the center of the paper. *Only on one side.
- Close the paper.
- Start rubbing the paper both in an upward and downward motion. This will move the paint inside the paper.
- Once finished rubbing. Open the paper.
- You should now have a Butterfly Blot. It is up to you to either leave it or wait and cut it out.
Materials: Black marker, paper-plate, and water colors.
Directions:
- Prepare ahead of time. Draw a butterfly on the inward side of the plate using the black marker. ( First Body: Tall skinny oval. Wings: Four large ovals both- two positioned upward and slant and two downward and slant)
- Water color the butterfly and then, let dry.
- Cut out. Separate the wings by cutting the middle line. This will give the wings motion.
Closure:
- Review All of the Lessons. Specifically the process of Growing into a Butterfly.
- Gain some insight as to what the child remembers by asking questions.
- Have the child explain in their own words the process regarding the 'Caterpillar to Butterfly'
- Review the Books.
- Read the Books again.
- Visit a local Butterfly Garden and/or exhibit.
- Learn the different names of butterflies.
- Take a nature walk in order to see any butterflies.
- Finally: Read!!!!
~ Incredible story line.
~ Appropriate for young readers.
~ Visually stimulating and
~ Includes several Science concepts.
No comments:
Post a Comment