
{Bears}
This unit was originally designed to discuss and learn more about 'Polar Bears'. However, after several stories and activities, I noticed that my little one was becoming more and more excited about what we were doing... with that, I happily decided to expand the theme further towards different bear species.
** There are Eight different types of Bears: Brown Bear also known as Grizzly Bear or the Bear with Many Names, Black Bear, Sloth Bear, Sun Bear, Panda Bear, Polar Bear, Asiatic Black Bear, and Spectacled Bear. During my research and preparation I came across a helpful and informative website called the "Great Bear Foundation.
This foundation researches the variety of bears while trying to make it known to the public that the bears need funding for support and safety from extinction. The website pinpoints strong research regarding the topic. .jpg) |
| Fun Fictional Books |
With that, I highly encourage having creative discussions with regards to the lessons below. You can do this before and/or after the projects, reading the books, and lessons. By doing so would allow the child to express their personal thoughts about the topic and/or what they have learned. This is one tool that I often practice ~ It helps gather prior knowledge through the process of what needs further development and/or modifications. Personally, I like to know what the child remembered throughout. It is truly amazing just how much children are able to recall.
Possible discussion ideas:
* The similiarities and differences between each type of bear...
* Description of what each bear looks like...
* How and where each type of bear lives...
* The eating habits of the bears...
* 'Compare and Contrast' each type of bear...
* Which one was the favorite bear...
* The discussions are endless!
**Hope that you have fun!!
Enjoy!!
Enjoy!!
Introduction
This is the time to briefly go over the different types of bears and 'touch and feel' any stuffed ones that you might have lying around. {Again} This will help you gather any knowledge about what your little one may know about the subject and/or animals.
HAVE Fun and Read, Read, Read!!!
I have included various books ~ Hopefully, they will encourage both parents and young ones alike towards the passion for reading, learning, and exploration.
Read: "A Bear for You" By: Kirsten Hall and Ilustrated by Iole Rosa
This is a fun little book. It is great for those who are learning to read and/or those developing stronger reading skills. Perfect for Pre-K and Kindergarteners. This simple introductory book briefly discusses several different types of bears. It has soft illustrations that attract various age groups.
Lesson 1: 'Polar Bears'

Read: "Polar Bears" By: Norbert Rosing~
This is an interesting book with real life photographs. The photos within truly seek out the attention of readers both young and old[er]. It is not only attractive ~ it is incredibly informative, detail oriented, and heartfelt with regards to all of the loving animals included within the story. It will, however, need to be modified according to age. My son absolutely loved looking at the pictures. Once finished, he talked and asked a LOT of questions about the different things within the book, such as: 'What are the bears doing?', 'What is that animal?', 'What are they sleeping in?' and lots more.
Obviously, we don't live in this wonderful white world so, I have included a short clip in order to demonstrate a brief glimpse.
Obviously, we don't live in this wonderful white world so, I have included a short clip in order to demonstrate a brief glimpse.
A Beautiful Little Video of a Mother with her Cubs!!
The Scenery within the video is Absolutely Breathtaking.
My son, was in Awww!
Watching will give a slight insight to a world beyond...
~ Talk about Den, the Mother, and yes, the cubs!
Activity 1: Polar Bear Ice Dens
~ Discuss where Polar Bears Live
~ Discuss the location and the glaciers
~ Discuss the weather and why polar bears need dens.
~ Reference back to the video clip.
~ Reference back to the video clip.
~ This activity is great for sensory.
~ Use the necessary vocabular words such as: 'dens', 'cold', 'freezing', etc.
~ Use the necessary vocabular words such as: 'dens', 'cold', 'freezing', etc.
Materials:
 |
| Ice Cubes, Salt, A Bowl, and A small container. |
Directions:
 |
1. Use different shape ice cubes 2. Put the ice cubes one at a time on the plate. 3. Pour a liberal amount of salt all over the ice. |
 |
| 4. Stack the ice slowly on the plate. They will stick- it does take time. |
Activity 2: Sugar Den
Materials:
- 1 box of sugar cubes
- 1 tacky glue bottle
- 1 paper plate
Directions:
- Start stacking the sugar cubes in an arch shape on the plate... (glue one on top of each other.)
- Cover part of the arch with more cubes.
~ Easy project.
~ Great for tactile and use of fine motor skills.
~ Connections will soon be made "freezing" and/or "cold" ... "feels like this" or "this is what cold water (or) freezing water feels like"
The Author and Illustrator, Hans de Beer wrote several creative and fun 'Little Polar Bear' books. The characters, specifically, the 'Little Polor Bear' within the books expanded further within growth throughout his personal experiences. With that, he developed most of the time a stronger self-esteem, established friendships, and overcame different challenges.

~ I highly recommend ~
- Little Polar Bear
- Little Polar Bear Finds a Friend
- Little Polar Bear and the Reindeer
- Little Polar Bear and the Husky Pup
- Little Polar Bear Take Me Home!
- Little Polar Bear and the Brave Little Hare
~ After reading be sure to discuss the different animals, locations, and various situations regarding the animals: Where the animals Lived, How they lived, Where and How they slept, What they ate, How they were able to get food, etc.
Activity 3: Ice Glaciers

Materials:
- Water
- Plastic Bowls or cups (various sizes)
- One large class bowl.
- Small plastic polar bears or white strofoam bear cut-outs
*We Recycled the bears from a cup~ it worked.
Directions:
- Pour cold water into the plastic containers.
- Put the bears in the water.
- Put the containers in the freezer overnight.
- Discuss the process then, read one of the polar bear books mentioned above.
- Next day, pour warm water over the frozen containers...then, put the formed ice (glaciers) in a large bowl of cold water.
*My little one had a fun time with this. He was constantly putting his hands in the cold water, touching the bears, and talking about the ice (glaciers), all while going back and forth... far as to what he remembered from the stories, lessons, and video clip .
** Be sure to use vocabulary words: "Glaciers", "Ice", "Cold", "freezing", etc.
In addition, after playing with the "glaciers" myself.... I read another book while he did both... played and listened.
In addition, after playing with the "glaciers" myself.... I read another book while he did both... played and listened.
- White Bear Template
- 20-25 White cotton balls

- Glue stick
- Black pen
- 2 Wiggly eyes

Activity 4: Cotton Ball Polar Bears
Materials:


Directions:
- Glue the cotton balls onto the bear.
- Glue the wiggle eyes towards the top.
- Draw a nose and mouth
- Once finished, review and read another book.
*Great for those who have tactile issues....with pulling the cotton apart, picking the cotton ball up one at a time, placing the glue on the paper, etc.
Activity 5: "Monart" Polar Bear
I admit, I lack knowledge within the art world. I used to call this type of activity "Watch and Draw." My wonderful friend enlightened me regarding the "Monart" concept and theory behind art. Monart allows children to deeply observe, appreciate, and attempt to independently draw by and for themselves.(Note, draw by themselves) Therefore, I highly recommend teachers, parents, and children to view and research the Monart School of Arts website. It is vibrant, creative, and truly educational and geared for those who are interested in the topic.http://monart.com/about/method/
Explore an Open Mind on Paper!!
Materials:
- White crayon
- Color choice of construction paper.
 |
| My three-year-old did this all by himself. |
1. Visually demonstrate in front of the student.
2. One simple step at a time.... meaning use short phrases.
3. Take your time and observe the child draw.
4. Do not correct any mistakes!! (i.e. if the child draws a 'long line' instead of a 'short line' don't worry)Allow the child to freely draw!! Reason- you want to establish creativity... being overly stressful on profection will not allow that to happen.
- Two Paper Plates
- Black Water Color Paint
- Paint Brush
- Two large wiggly eyes
- Tacky glue
- Stapler
- One Black Pipe Cleaner
- Black construction paper
Lesson 2: Panda Bears

I recommend reading this very cute little story by Matthew Baek ~'Polar Bear and Panda." The author delivered a creative story that gave insight in regards to differences between two 'culturally' different bears. What made this fictional based book an interesting read... is the fact, you can possibly relate the story towards actual people and other various cultural groups. *I find that to be a great discussion for the older students*
 With that, another book ~ 'New Neighbors' maintained a similar situation. Stan and Jan Berenstain, I believe did a great job designing the story with regards towards understanding differences while at the same time realizing that 'We' share a lot of similiaries and interests. Both books are worth the read as they help children open their eyes towards accpetance.
 Activity 1: Paper Plate Panda
Material:
Hot glue gun *optional
Directions:
 |
Step 1: Cut 2 medium size black ovals. Step 2: Glue the black ovals on the paper plate (towards the top) Step 3: Glue the wiggly eyes on the black ovals. Step 4: Cut two 3 inch black ovals. (Ears) Step 5: Glue the ears on the back of the top portion of the plate. *The tacky glue worked better than regular white clue |
 |
Step 7: Cut the pipe cleaner in half. With a half-twirl the pipe cleaner. Step 8: Either with the hot glue gun or tacky glue... glue the twirled pipe cleaner lower and between the eyes. (nose) Step 9: Cut the remaining pipe cleaner in half. Hot glue one of the pieces straight down from the nose and curve the other for the mouth.  Step 10: Now, for the second paper plate. Make two black stripes. Step 11: Water-Color Black on the upper and lower end of the plate. Set to dry. Step 12: Once dry glue the head of the bear onto the body. Step 13: Cut two black medium size ovals for the arms and two small 'L' shapes for the legs. Step 14: Glue the arms and legs onto the body. * Depending on the paper plate you may have to staple the head and body together.  |
- One plastic jar (Recyle a jar...We used glass)
- One large piece of both black and white tissue paper.
- 1 pencil or paintbrush
- 1 large piece of black construction paper
- Tacky glue
- Scissors
- Two medium size wiggly eyes.
- Black and Red Crayon
- Tape
Read: "Panda Bear, Panda, What do you see?" By: Eric Carle and Bill Martin, Jr.
Another fun book from one my favorite illustrators ~ Eric Carle! Colorful story!!
Activity 2: Panda Jar
Materials:
 |
| Step 1: Scrunch up the black and white tissue paper. Step 2: Stuff the tissue down using the pencil or paintbrush. |
 |
| Step 4: Cover the lid with black tissue paper. Secure with tape underneith. |
 |
| Step 5: Cut -- One white Bear Head -- Four black ovals (eyes & ears) -- Another two black ovals (arms) -- Two 'L' shapes (legs) *Make a small slit on the bottom of each piece. *Tape if necessary. Step 6: Glue the wiggly eyes and draw the nose & mouth. **Enjoy! |
Activity 2: Playdoh Panda
Material:
- Black and White Playdoh

Directions:
Have fun rolling the playdoh together.
 "Busy Panda" by: John Shindel
Pictures by: Lisa and Mike Husar
This is a delightful and simple read. The pictures are adorable!
 Read:
Read:
"Mama Mama" by: Jean Marzollo
Pictures by: Laura Regan.
This book is a simple and attractive read. Great for bedtime!!
Lesson 3: Brown Bear
Material:
- Black and White Playdoh

Directions:
Have fun rolling the playdoh together.

Pictures by: Lisa and Mike Husar
This is a delightful and simple read. The pictures are adorable!

"Mama Mama" by: Jean Marzollo
Pictures by: Laura Regan.
This book is a simple and attractive read. Great for bedtime!!
Lesson 3: Brown Bear

Pick up a Book and Read Something
Yay!! Another Eric Carle and Bill Martin Jr. book
“Brown Bear, Brown Bear What do You see?”
A fun activity to go along with this… My son and I acted out the animals within the story ~ fun time… and loving memories. In addition, we changed the names of the bears we were acting out for example the Sun Bear ~ We would lay on the floor pretending we were laying out on a tree branch.
I found ‘Our Three Bears’ by: Ron Hirschi to be an outstanding book. The visuals within stood out in ways that you can’t help but stare. Read and Use this book as a resource for the following bears mentioned
~ Black Bear, Grizzly, and the Wonderful Polar Bear~

Within you will gather information regarding:
- Where and How they Live
- Hibernation information and various other - Specific Bear Facts
Activity 1: "Paper Plate Brown Bear"
Materials:
- 1 Paper Plate *Note- don't use styrofoam - we did- doesn't work very well.
- Brown Washable Paint
- Newspaper
- Smock or old t-shirt.
- 2 large wiggly eyes
- 2 medium size brown construction paper circles
- 1 large black construction paper oval
- sissors
- glue bottle
- water

Directions:
- Set up the table (newspaper on the table, child in the smock or t-shirt, and paint out).
- Paint the paper plate brown. Set to dry.
- Glue the medium size circles on the opposite side of the plate 3 inches apart. (These are the ears).
- Glue the large black oval in the middle of the plate.
- Glue the two large wiggly eyes up above the black oval.
- With a dark brown or black- Start from the black oval- draw a short line straight down and then, a smile.
- Enjoy your Painted Bear.
"Amazing Bears"

2. “Bears" by: Helen Gilks and AndrewBale This 'Big' book has large visuals that would be interesting for a little one. My son, loved looking at the cover photo, especially at the eyes.
The content would need to be modified depending on the age of the child.
Actvity 2: Pinecone Bears
(One of my personal favorite througout the unit... who am I kidding?!? They all are...because I am doing them with my loving little man)
 |
| Mr. & Mrs. Pinecone |
Materials:
- Small/Medium Size Pinecone
- Hot Glue Gun
- 2 Medium Size Wiggly Eyes
- Red and Black pipe cleaners
- Small oval shape brown construction paper and rounded nose.

Directions:
1. Place the pinecone in an upwards position.
2. Turn on the hot glue gun. (adult only)
2. Set up the material: Cut all of the pipe cleaners in 2-3 inches each.
3. Cut the brown construction paper in an oval.
4. Cut a small rounded brown construction paper for the nose.
5. Glue on face. (Mainly the adult due to the glue)
6. Little one can curl the pipe cleaner nose, glue on the ears, and the little part of the nose.
 |
| :) My son placed them this way, "They are talking, Mommy" |
Activity 3: Footprint Bear
*Another Favorite
Materials:
- Brown Washable Paint
- Ribbon of choice
- 2 Medium size Wiggly eyes
- Tacky Glue
- 1 Black marker
- 3 inch Ribbon
Directions
1. Paint the childs foot or lightly step on the paint
2. Gently place the foot on the paper
3. Paint small arms and legs
3. Wash up
4. Once dry- Glue the wiggly eyes and red ribbon mouth
5. Draw the nose
6. Make a bow out of the ribbon- Glue on the bear.
Activity 4: Brown Salt Bear
Materials:

- bear template or draw a bear
- 1/4 cup of salt
- 1 tablespoon of brown paint
- glue
- 2 large wiggly eyes
- black marker
- glue stick
- black construction paper
Directions:
1. Mix the salt and brown paint gently together
2. Glue the entire bear with the glue stick
3. Rub the salt mixture all over the bear.
4. Draw the black nose.
5. Once dry- cut out
6. Glue on the black construction paper
7. Glue the eyes on.
This is a fun activity.
The salt gives the craft a fuzzy feel!
*Another Favorite
 |
| Woooohoooo Very Very Cute!!! |
- Brown Washable Paint
- Ribbon of choice
- 2 Medium size Wiggly eyes
- Tacky Glue
- 1 Black marker
- 3 inch Ribbon
Directions
1. Paint the childs foot or lightly step on the paint
2. Gently place the foot on the paper
3. Paint small arms and legs
3. Wash up
4. Once dry- Glue the wiggly eyes and red ribbon mouth
5. Draw the nose
6. Make a bow out of the ribbon- Glue on the bear.
Activity 4: Brown Salt Bear
Materials:

- bear template or draw a bear
- 1/4 cup of salt
- 1 tablespoon of brown paint
- glue
- 2 large wiggly eyes
- black marker
- glue stick
- black construction paper
Directions:
1. Mix the salt and brown paint gently together
2. Glue the entire bear with the glue stick
3. Rub the salt mixture all over the bear.
4. Draw the black nose.
5. Once dry- cut out
6. Glue on the black construction paper
7. Glue the eyes on.
This is a fun activity.
The salt gives the craft a fuzzy feel!
 |
This project is great for tactile exposure!! Activity 5: Hibernation/Cave: Paper Plate Story Bear  This simple craft made a lot of sense to my little one. He understood the definition and concept regarding ‘hibernation’ very well. First, I read a story from one of the provided books and pointed to the bears that were hibernating…. Afterwards, we really focused on where the different bears hibernate (i.e. “Caves”, “Dens”, etc.) Materials:- Bear Template - Glue Stick - One Paper Plate Directions: 1. Color, Cut, and Glue the Bear Template on the plate 2. Write what you would like on the plate (i.e. Outside: "The bear is getting sleepy." Inside: "The bear is sleepy in a cave."  Activity 6: Monart: Brown Bear  - Brown Crayon - Brown Construction Paper Directions: Follow the same concept as the one above. Lesson 4: "Black Bear" Read: "Black Bear" by Daniel J. Cox. Stunning Book that provides a outstanding visuals.  - Highly recommend - Appealing to both young and old(er) - Interesting photos   - Bear Template - Black marker - Tacky Glue - Black felt bear - Oval light brown shape - Triangle black felt (Small) - One (1 inch) thin black felt shape - Two small wiggly eyes. - 1 piece of brown construction paper - pieces of grass and twigs Directions: 1. Prepare ahead of time the project (the template and the felt pieces. 2. Glue the nose, mouth, eyes, bear, grass, and twigs on the construction paper. 3. Allow to Dry.  *The same could be done for the Sloth Bear, Sun Bear, and/or the Spectactled Bear. -Just discuss the differences. Read: 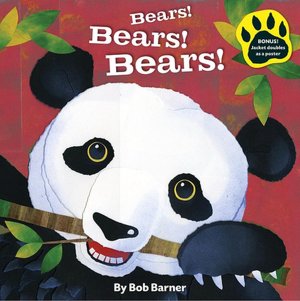 “Bears! Bears! Bears!” by:Bob Barner. This book is colorful and informative for the young reader. It has short sentences that end with the use of rhyme.The last page, briefly describes each bear that corresponds with an appropriate photo. Discussion: Talk about the Spectacted Bears while eating vegtables ( a popular diet amongst the beautiful animals). More fun Clips: Sloth Bears: http://youtu.be/Yy98QoBRZrE Sun Bears: http://youtu.be/US8Gx9T6lUA *Compare and Contrast the video clips with the book * Lesson 5: Math Lesson Activity 1: Graphing with Bears  Materials: - Graph Chart - Gummy Bears  Directions: 1. Hand the child a few gummy bears. 2. Help the child graph. 3. Once finished ask about which one has "more", "less", and/or "the same." In addition, ask "What are we doing?" "Graphing" * My son and I practiced this for a week straight. * What was great we did this after dinner - the gummy bears were a 'sugar free desert'. Activity 2: Gummy Bear Sort  Materials: - (4-5) small napkins - An assorment of gummy bears (pref. sugar free) Directions: 1. Have the child sort the bears by color. 2. Ask the child what he/she is doing. 3. Ask which one has "more", "less", and "the same"and/or "egual" *Be sure to use vocabulary words and concept of the lessons... "Sorting" "Sorting by Color", etc. ***This is one unit that can go and on.... I hope that you were able to get a few ideas regarding the topic. Once again, I thank you for looking at the site and remember I always welcome feedback*** -God Bless! |


